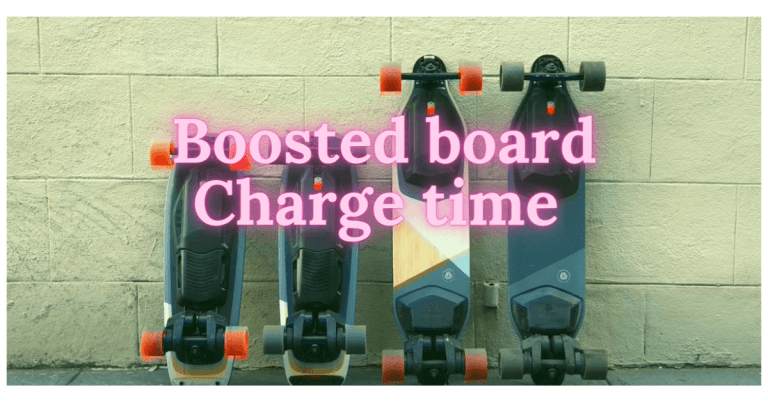
Electric skateboarding is a fun experience until it runs out of battery. It’s very annoying when the battery of an e-board runs out of juice in the middle of cruising. But that’s not really a big issue. This article will help you give instructions on how to change the battery on an electric skateboard.
Every single thing in this universe owns an expiry date, so as the battery of an electric skateboard. Do not worry if it breaks down on the road because today, you will learn how to change the battery on an electric skateboard. It’s pretty simple! Not a hard science or anything else. You need few tools, patience of mind, a bit of practice, and you are good to go.
Before we get curious about changing the battery on an electric skateboard, let’s discuss why we need to change the battery of an electric skateboard? Isn’t it okay to cruise around with the same range and speed, or do we really need to upgrade it over time? Do we only need to change the battery when it breaks down? There are a lot of questions regarding why one may need to change the battery of an electric skateboard. So let’s get into it!
Why do you need to change the battery on an electric skateboard?
The battery of an electric skateboard is designed specifically for a particular period of time. It dies down after its tenancy. So at that time, you may need to change the battery of an electric skateboard. So keeping in mind the queries of modern riders, there are different reasons due to which one could think of changing the electric skateboard. Such as:
- If the board and the battery are adequately maintained, it lasts for 3 years, and after that, you may need to change the board’s battery.
- An average Lithium-ion battery lasts for 300 to 1000 charge cycles before reaching the limit, so at that time, you should change the battery on an electric skateboard.
- If you are a daily commuter and use your e-board daily, then an electric skateboard battery may die off within 1-2 years. Here again, you will require a replacement.
- A professional or fast rider may need to upgrade the range of an electric skateboard and change the battery.
- Sometimes the cells on the battery die earlier because of overcharging, and hence it requires a replacement.
These are some significant causes because of which you may need to change the battery on an electric skateboard. As neither of the reasons is so technical that you see the mechanic, you should have the skill to change the battery of your e-board on your own. This article will guide you through straightforward and essential steps to change an electric skateboard battery within no less time.
Material required
No technicalities, no rocket science! You just need two very simple and daily use tools to change the battery on an electric skateboard.
- Skate T-tool
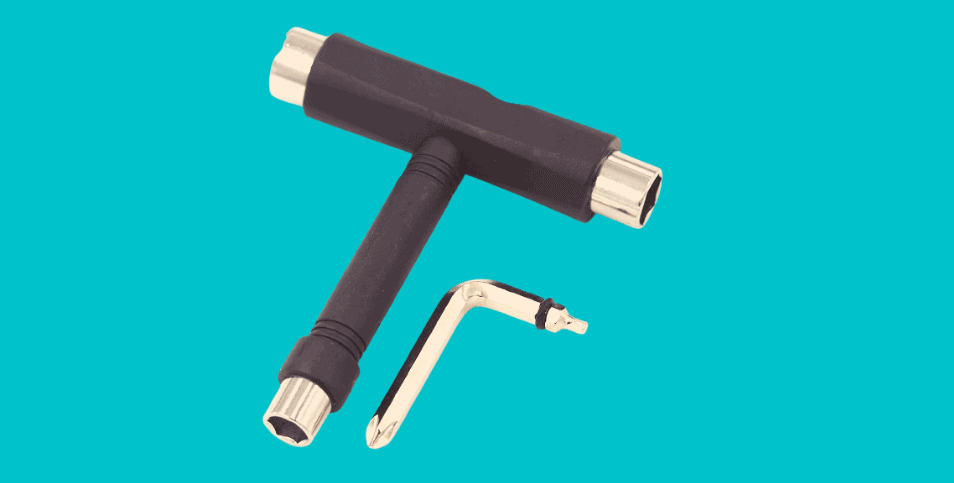
The most important and significant tool required to reassemble or repair an electric skateboard is Skate T-tool, metaphorically called “the Skateboarder’s Swiss Army Knife.” You will need a skate T-tool to untighten the bolts on the board and replace the battery.
- L Key Tool

An L-shaped Hex key or Allen Key is used to drive the bolts and nuts with its hexagonal sockets. This tool is more often used to untighten the bolts from anything and repair the item. To change the battery on an electric skateboard, you would require a hex key to loosen the screws of the board.
Once you are done with all the prerequisites, it’s time to replace or change the battery on an electric skateboard. These simple, easy, and doable steps will help you replace the battery on an e-board within 5 minutes.
Steps to Change the Battery on an Electric Skateboard within 5-Minutes
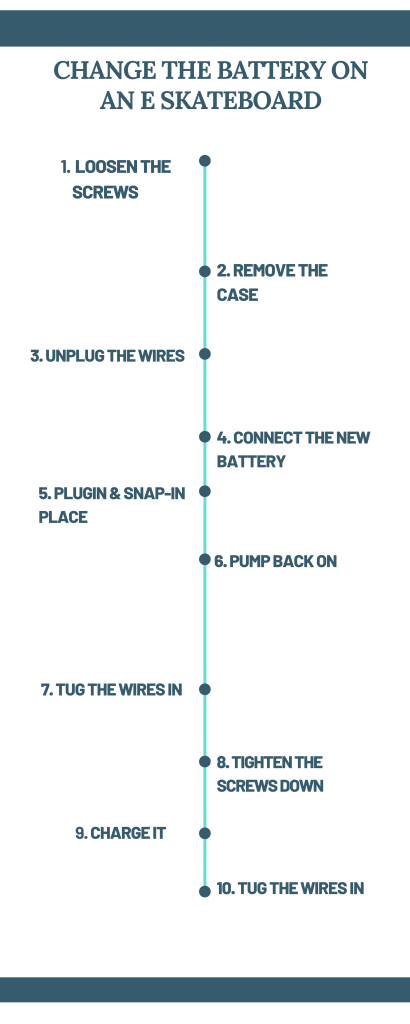
1. Loosen the Screws
Use either T-tool or Hex Key to untighten all the bolts that have fixed the battery with the board. Usually, the battery of an electric skateboard is located below the deck within metal or steel covering. You need to loosen the screws and take off the metal casing.
2. Remove the Case
An electric skateboard battery is a central component, so it’s protected in excellent covering or packaging that protects it from water and jerks and jolts. So here you need to remove the case to replace the battery on an electric skateboard.
3. Unplug the Wires
After taking off the case, you will see a battery plugged with two wires. That wires are attached to the drive system and eventually make the board able to run. Here you need to unplug the cables from the battery. Look, it is effortless! You just need to push it off, and that’s it.
4. Connect the New Battery
In the fourth step, you need to connect the new battery with the wires. If your purpose is to upgrade the range, you must compare the previous battery’s power watts with that of the new replacement. So for this specific purpose, your new battery should have a more excellent watt of power than the previous one.
5. Plugin & Snap-in Place
You must have noticed which wires have been plugged earlier in which slot. Apply the exact placement here while plugin the new battery. Usually, there is no specific order to connect the wires with the battery, so you don’t need to worry. Just remember the opposite poles and snap-in correctly.
6. Pump Back on
As you have connected the wires with the new battery, fix the casing back on the battery as we need to protect the battery entirely from any snag, so pump back on.
7. Tug the Wires in
Place the metal case properly on the battery by covering it from all sides. Tug the wires inside the case to avoid any kind of short-circuiting in the rain. Carefully tug in the wires and pack them in the protective case.
8. Tighten the Screws Down
Now tighten the screws with your entire workforce. Remember do not forget the double-check the screws as it is imperative to constrict them down completely. Otherwise, you could face a real hurdle while riding.
9. Charge it
Here you are done with the replacement. It is time to charge the battery. A sharp tip for you is always setting the battery fully before riding it because a new battery needs to charge up the cells totally, so a full charge is a must before riding the e-board.
10. Ride it
Once a battery gives you a green signal, you are good to go. Ride it to its fullest and begin a new adventure. A new battery provides you the confidence to ride with self-assurance and enjoy the ride.
A Tip to Remember
Once you are done with the battery’s replacement on an electric skateboard, you are very much familiar with its whole processing and handling. So now, whenever you face the hurdle of battery, you can easily change it anywhere at any time. For example, if you ride off to visit your friends in the nearby town and it runs out of the battery in the middle of the way, you can change the battery with another fully charged one. It would take less than 5 minutes, and you could continue your ride towards the destination.
Replacing the battery in the middle of the ride requires nothing new but the same tools mentioned above. Carry a backpack with you containing the tools (T-tool and L-key Tool) and a new fully charged battery. Change the battery and rock the boat.